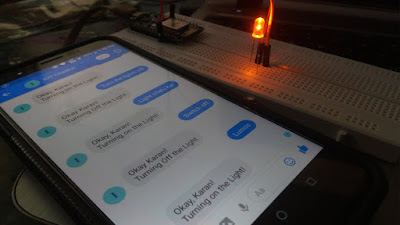
Controlling an LED using Voice Based Google Assistant via Adafruit MQTT
**STEPS**
2. Download the Arduino Ide software (version 1.6.5 I prefer ; you can go for higher version too) for your computer/laptop from www.arduino.cc (Its free) Once downloaded open it, go to File>Preferences and in additional board manager url type the url http://arduino.esp8266.com/stable/package_esp8266com_index.json
3. Go to Tools>Boards>Board Manager Now a small download will take place. (Around 20 min it will take). Once done type Esp so it should show “installed”
4. Now go to Tools>Boards>Select NodeMcu (Esp 12E)
5. Now connect your Esp8266 to your laptop with usb cable then select the correct com
port in Tools>Port (If its not visible that means esp driver is not installed)
6. There are 2 libraries that are to be added. To add the 1st one go to Sketch>Include>Library> Manage Library then type wifi manager and install it.
7. To add the 2nd library go to Sketch>Include Library>ADD. Zip library then give location of
“Adafruit_MQTT.zip”
**Adafruit**
Go to http://io.adafruit.com/ and sign up for free ( Do it using your mobile as it works faster)
• Once signed in scroll a bit down where you will find “Actions”. Click on it and click on “ Create New Dashboard” . Now Type a name eg. “led” and click on create.
• Now you will be able to see the dashboard you created. Tap on it. Now tap on the plus sign “+” you can see to create a block. Now click on the 1st On/Off button. Type a feed name eg.”led” & click on create. Click on it > Next step> Create block.
• That’s all in Adafruit. Now go to the home page http://io.adafruit.com/ then click on “View AIO Key” Note down the Username & the Active Key.
**IFTTT**
Download IFTTT in your Phone.• Open it…Sign in …Go to My applets (can be found at bottom right)
• Click on the plus sign “+” seen above. Tap on “+this”. In search services search for Google Assistant. Tap on it. Tap on Say a simple Phrase. Complete the process. It asks for What do you want to say? Type there Lights on (as your wish). Type in the response also. Then tap on create Trigger.
• Now tap on “+that”. Search for “Adafruit”. Click on Send data to Adafruit. In feed
name put the feed name you had created in http://io.adafruit.com/ (in my case led). In Data to save type “ON” & click on create action. Click on finish.
• This way a Applet is created for “lights on” similarly repeat the entire process of
IFTTT for creating one more applet for “lights off “ command. That’s all with IFTTT.
**Arduino IDE (changes to be done in code)**
Now type in here as shown below your feed name (in my case bulb)
NOTE: *the codes are case sensitive so please take care.
Downloads:
1. Adafruit Library: Adafruit Library
2. Code: Google Assistant Code
Connections:
D2(In the Code written as 04, i.e GPIO04) of ESP8266 - Positive Terminal of LED
GND of ESP8266 - Negative Terminal of LED


